
Deployments
Deployments let you promote a Qlik Sense app or a Power BI report to a target environment directly from the Soterre Extension — using Soterre Deployment Plans for Qlik or item-level selection for Power BI — and review the full deployment history for the artifact.
INFO
The Deployments tab appears in the Soterre Extension popup when the current page is a Qlik Sense app or a Power BI report.
TIP
Make sure Soterre is configured in Options > Integrations and that your app/report is versioned in Soterre. Deployments in Soterre Extensions require Soterre v3.2.18 or later.
Deployment history
Open the Deployments tab to land on the History view. It lists every deployment for the current artifact — both those started from the Soterre Extension and those made in the Soterre UI:
- Origin — where the deployment was triggered (
Soterre ExtensionorSoterre UI). - Result — the outcome of the deployment.
- Target — the environment the artifact was deployed to.
- User(s) — who ran the deployment.
- Date — when it happened.
Use the Search history field to filter the list. Press Deploy Now to start a new deployment.
INFO
If Soterre can't be reached, the tab shows a warning and falls back to locally-tracked deployments only — deployments made in the Soterre UI may be missing until the connection is restored.
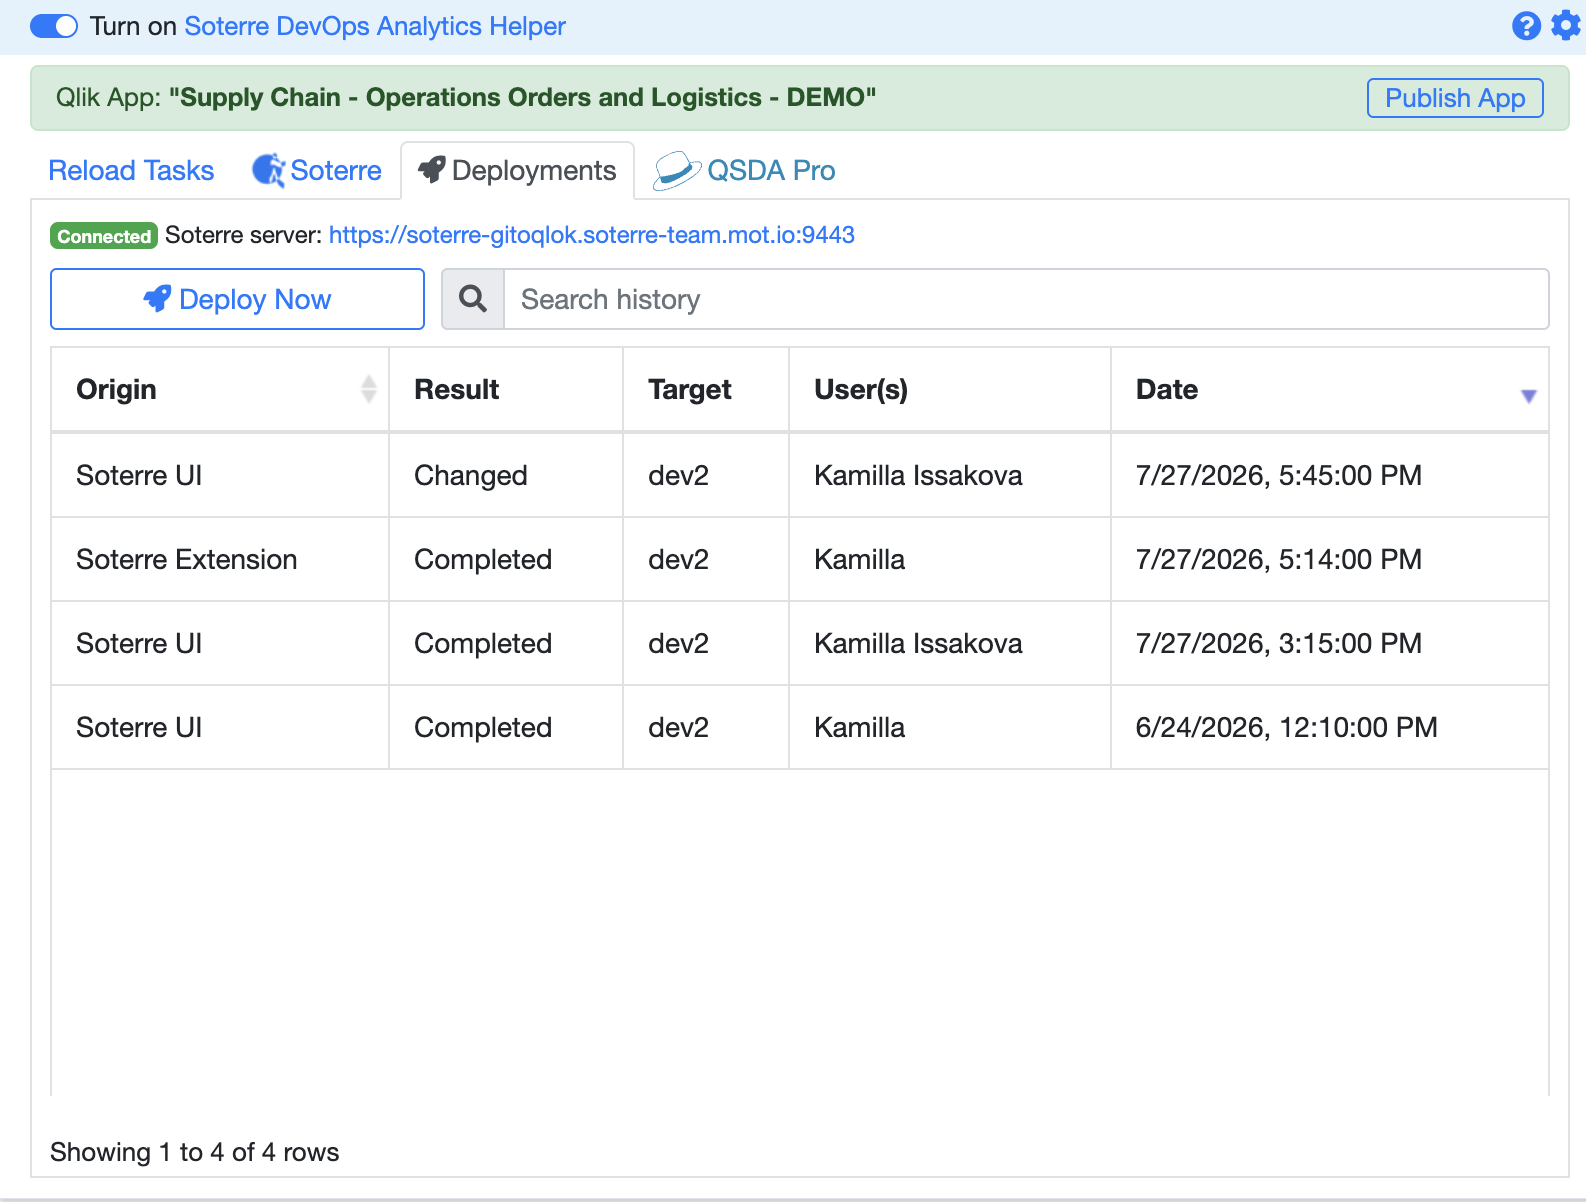
Deployment history for the current artifact
Deploy a Qlik Sense app
Open Deploy Now
On a Qlik Sense app, open the Deployments tab and press Deploy Now.
Choose a Deployment Plan
Select a Deployment Plan from the dropdown. Plans are defined in Soterre and determine the target environment and deployment behavior.
Optionally add a Comment describing the reason for this deployment.
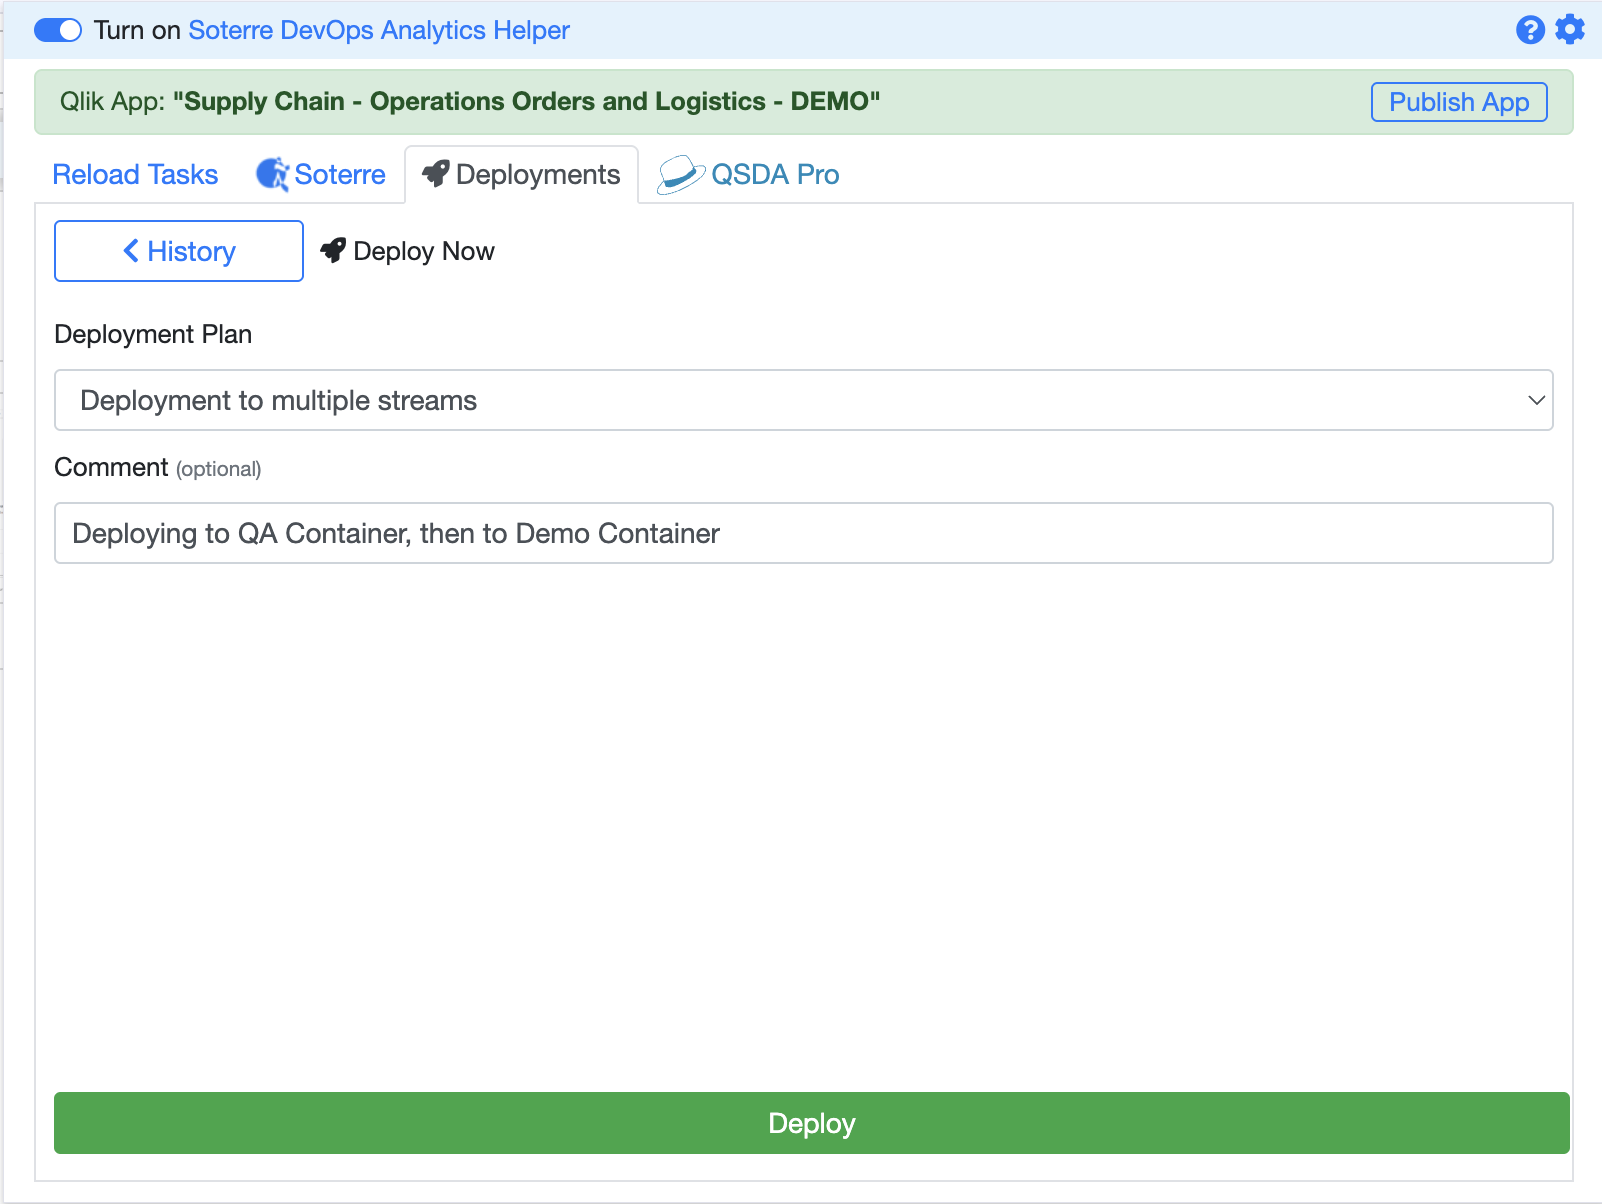
Qlik: select a Deployment Plan and add an optional comment
Deploy and track progress
Press Deploy. The extension runs an eligibility check and starts the deployment; any issue is reported inline. While the job runs, a progress panel shows the job ID, status, and date, and updates until the deployment reaches a terminal state.
When it finishes, the new deployment appears in the History view.
Deploy a Power BI report
Open Deploy Now
On a Power BI report, open the Deployments tab and press Deploy Now.
Choose items to deploy
The current report is added as the first item automatically. Press Add item to open the workspace browser, pick a Workspace, and select additional Semantic models and Reports to include. Use the filter to find items quickly.
Items deploy in order — drag to reorder them when the sequence matters (for example, deploy a semantic model before the report that depends on it).
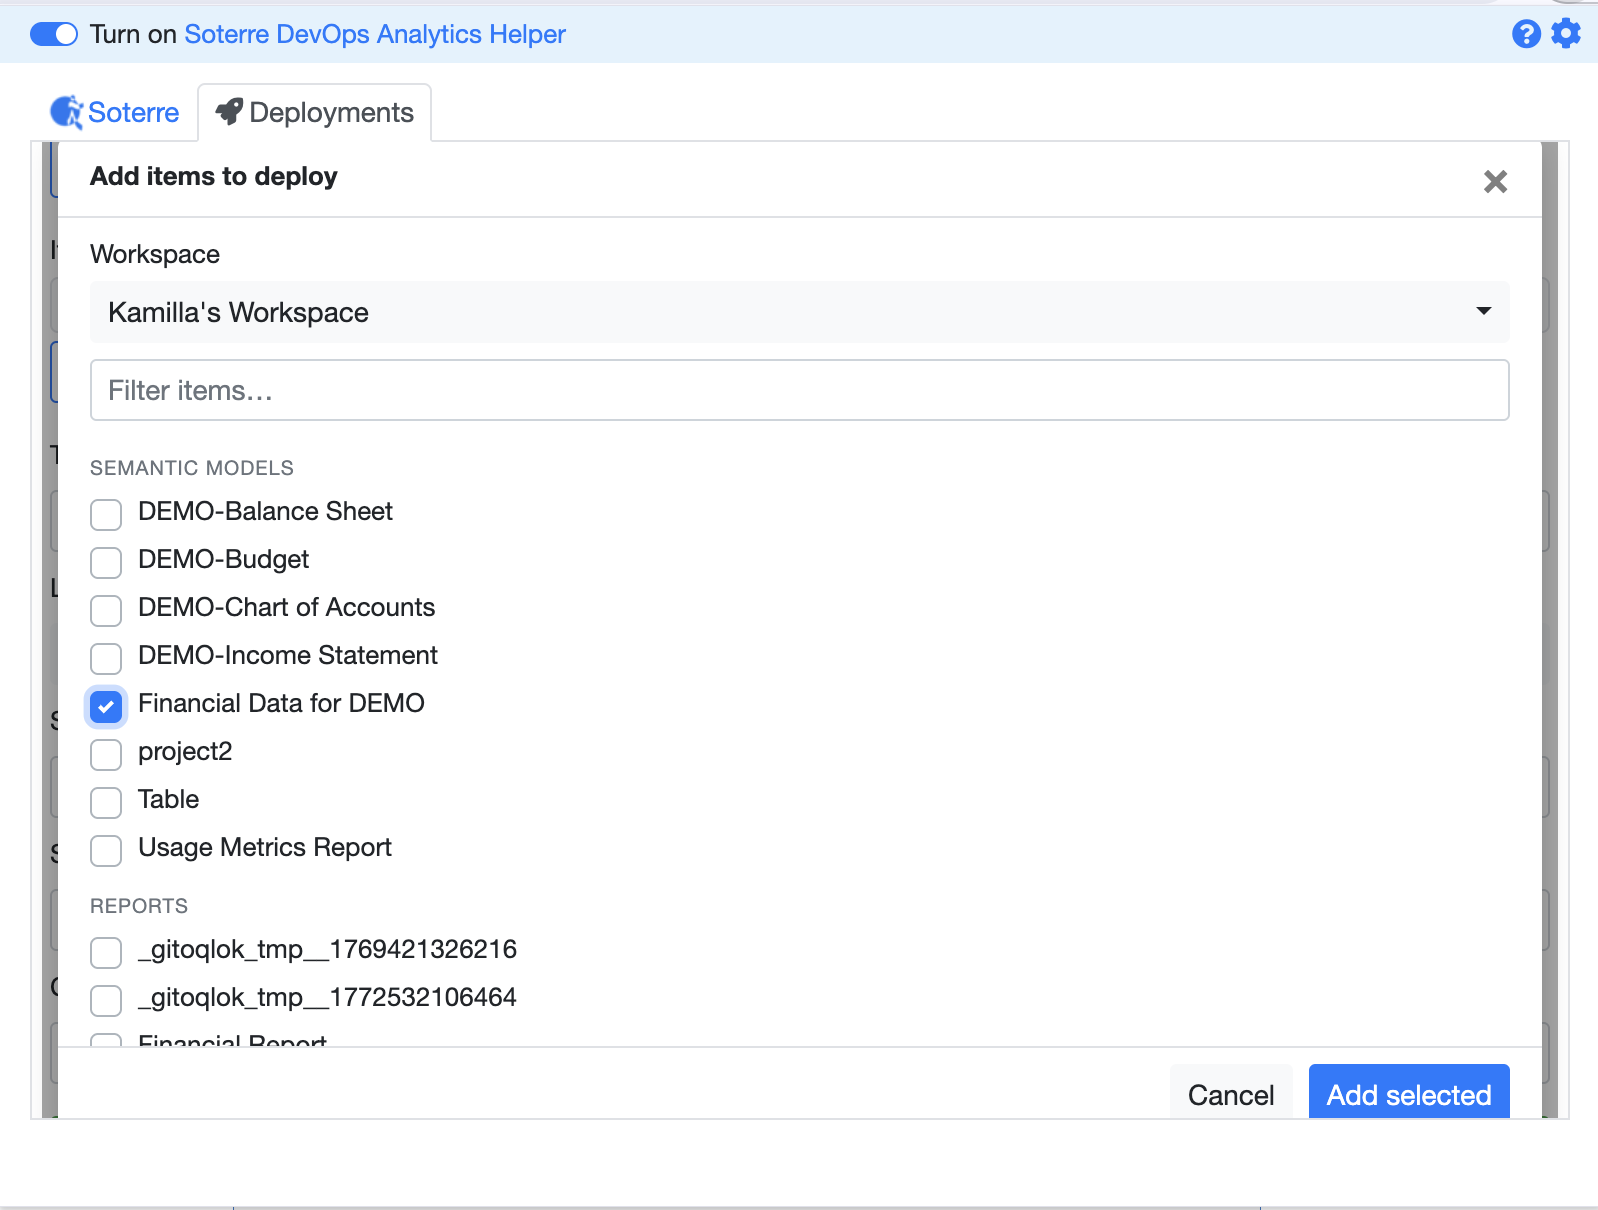
Power BI: browse a workspace and select semantic models and reports to deploy
Set the target and options
Configure the deployment:
- Target — the destination tenant/environment.
- Location (workspace) — the target workspace within that environment.
- Semantic model refresh —
Do not refresh semantic modelsorRefresh after deployment completes. - Soterre tag (optional) — tag the deployed version in Soterre.
- Comment (optional) — the reason for this deployment.
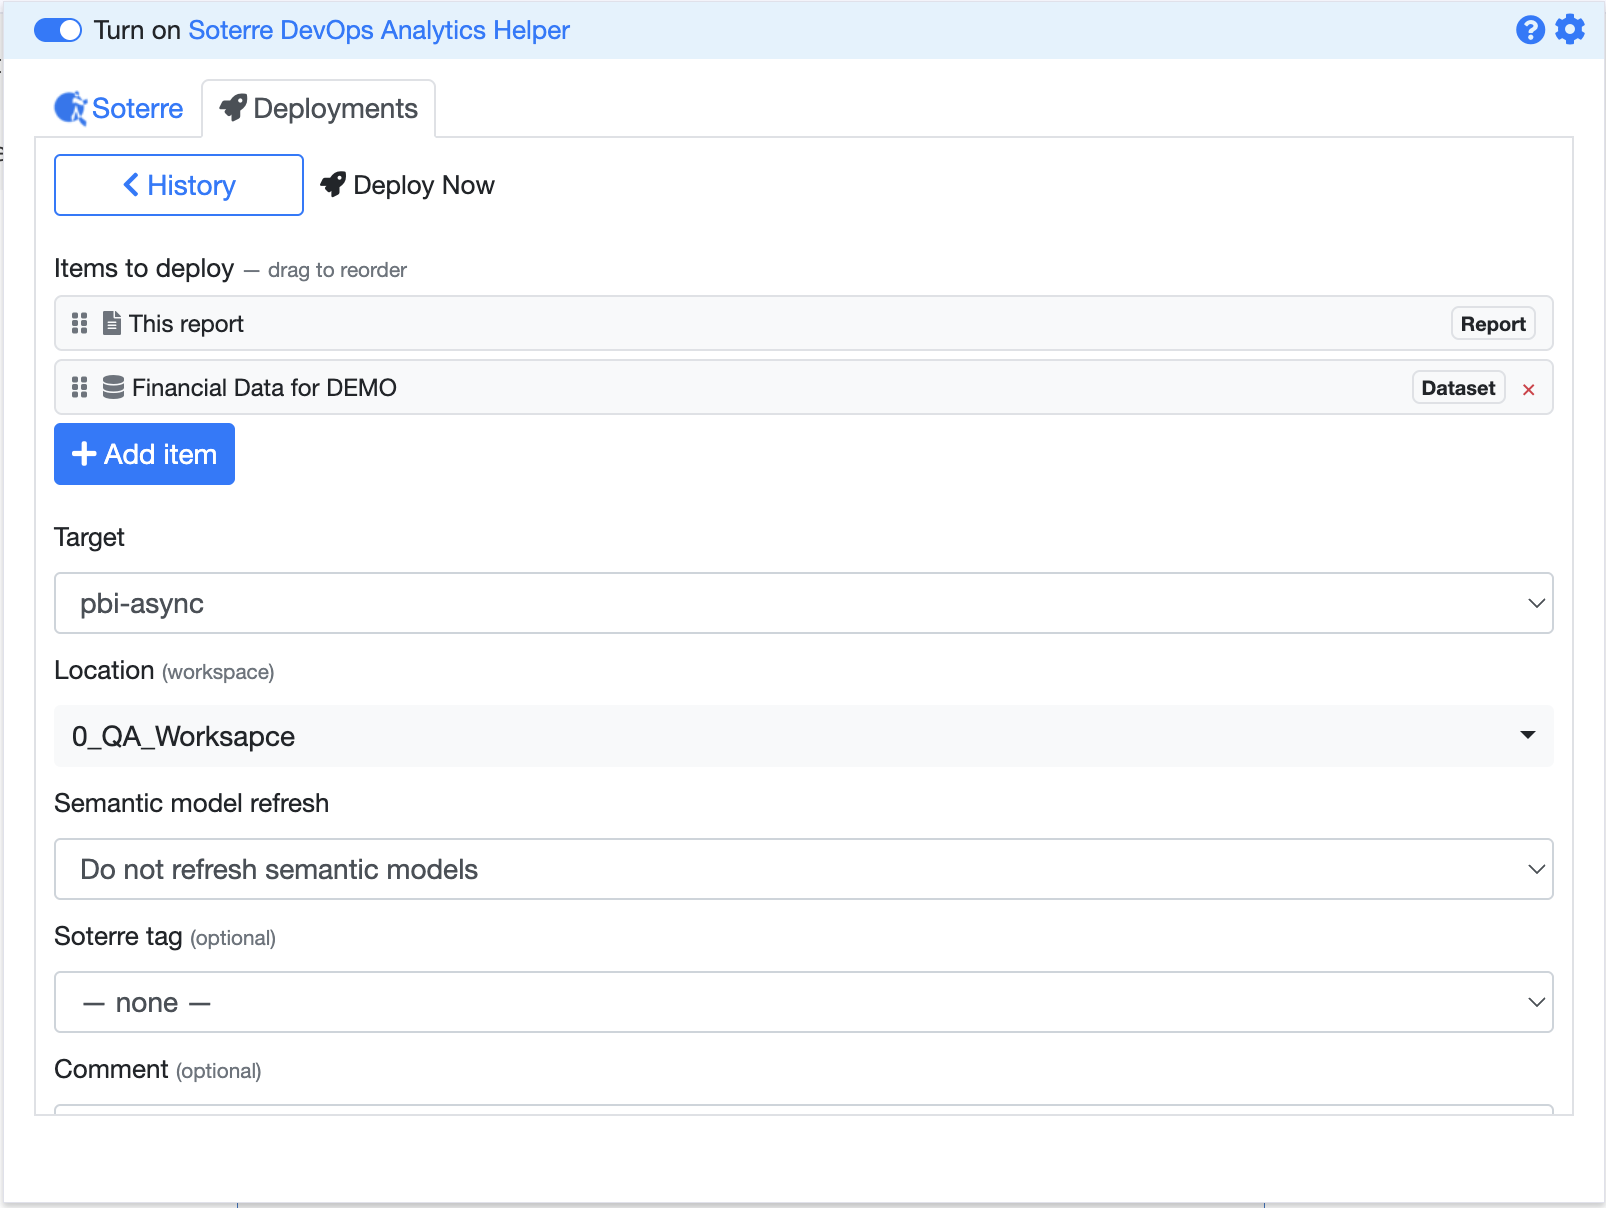
Power BI: set the target, workspace, refresh mode, tag, and comment
Deploy and track progress
Press Deploy. A progress panel shows each job's ID, status, and date until the deployment completes. The result then appears in the History view.